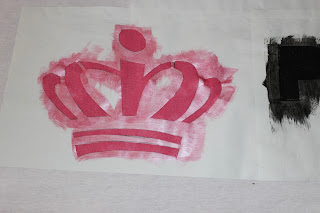
Have you ever noticed that large box of Freezer Wrap in the foil and plastic wrap section of your grocery store? I never noticed it before, but in my online search for a way to make a template I came across a blog that used this awesome paper. She traced an image onto the paper and then cut it out. I knew there must be a better way.
Insert Home Printer!
Cut your freezer paper to a sheet that will fit into your printer, this will also limit the size your template can ultimately be so this is great for smaller projects (t-shirts, bags, pillow cases, etc). In the case of my printer and Word too, I was limited to a max of 9"x22" which was perfect for my project.
If you have an image that is not large enough, trace it onto regular paper, scan it and resize using Word, or your favorite program. Word is the only one I was able to figure out :)
Once you have all your images on the computer, load one sheet at a time through the feeder of your printer and hit print. My printer reminds you to have the printing surface facing up when you feed it through.
Cut out your templates with an exacto knife and iron onto the cotton item of your choice using the cotton setting on your iron. Make sure to iron it down really well so the edges are sealed.
Fill in with fabric paint using a foam brush. You want to tap the paint on to fill and then lightly brush from the outside edge toward the middle to smooth it all out.
Once the paint has dried, peel up the corner of the paper and continue to pull at about a 45 degree angle to remove your template.
I decided to outline the edge of my crowns with more of the fabric paint so they stand out a little more since my project will be used for a photoshoot.
Project complete!
Since we will be hanging this up on a clothesline, I decided to use some of the paint to decorate a few of the clothes pins.


